How to Install a Retractable Hose Reel: Step-by-Step Guide
You bought a retractable hose reel. The box is sitting in the garage. Now what?
Most retractable hose reel installations take about 30–45 minutes with basic tools — no plumber and no contractor required. The details still matter. Mount it in the wrong spot and you will fight the hose every time you water. Use the wrong anchors and the bracket can pull away from the wall mid-season.
This guide covers wood-frame walls, brick or masonry, and vinyl siding, plus the spigot connection and the usual first-use fixes. Placement for yard coverage sits up front — height alone is not enough if the hose cannot reach the beds you care about.
What You’ll Need: Tools & Materials Checklist
Gather everything before you start. Nothing kills momentum like a mid-install hardware-store run.
Tools:
– Power drill with Phillips bit
– Drill bits (size depends on wall type — see sections below)
– Stud finder (for wood-frame walls)
– Level (a phone app works fine)
– Pencil or marker
– Tape measure
– Adjustable wrench
Materials (most included with the reel):
– Mounting bracket (included with reel)
– Lag screws or wood screws (usually included — check quality)
– Wall anchors (for masonry — rarely included; buy separately)
– Teflon tape (plumber’s tape)
– 3/4″ to 1/2″ hose adapter (if your spigot doesn’t match)
– Silicone caulk (optional — for sealing drill holes on masonry)
Pro tip: The screws in the box are often the weak link. If the reel holds a long hose (75 ft and up is a common class), upgrade to #10 x 3-inch stainless steel lag screws. An inexpensive hardware-store pack is usually enough — check current price rather than any dollar figure you see elsewhere.
Retailer prices change. Use the check-current-price links rather than any dollar figure on this page.
Recommended products
Giraffe Tools retractable hose reel:
DEWALT 20V drill/driver kit:
Wall anchor kit:
Browse mounting hardware:
Before You Start: Choosing the Right Location
This is the step most people rush — and the one that decides whether the reel is a daily help or a daily fight.
Distance from spigot
Mount the reel within about 3–5 feet of your outdoor faucet when you can. The leader hose (the short hose from spigot to reel) is commonly about 4–6 feet. Too far from the spigot and you need a longer leader or a better mount spot.
Wall height
The useful range is 3 to 5 feet off the ground — roughly waist to chest height. Too low and the hose drags during retraction. Too high and every pull is an overhead reach.
Placement for yard coverage (not just height)
Height keeps the hose off the dirt. Placement decides what you can actually water.
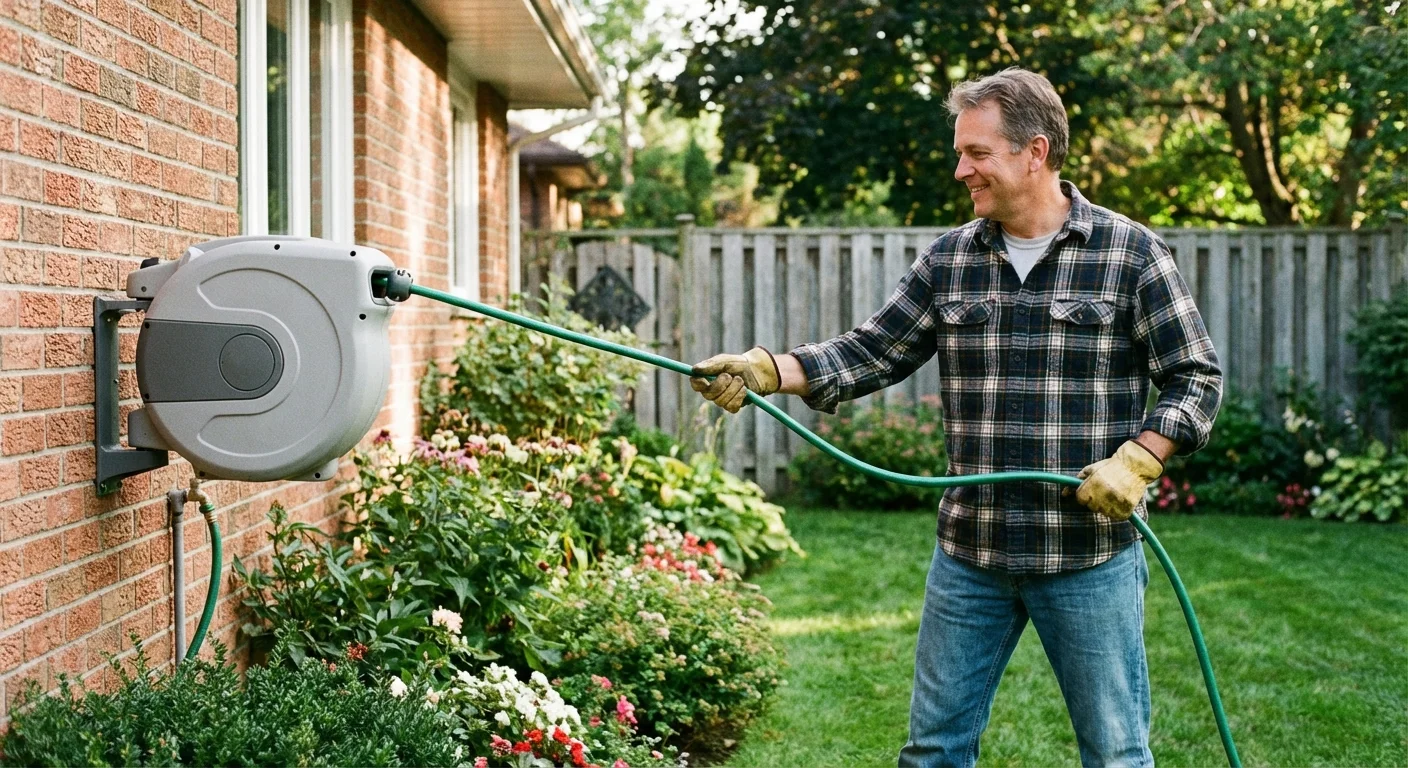
- Aim the reel toward the beds and lawn edges you water most — not only toward the nearest empty wall patch.
- A corner or side-wall mount with a swivel bracket often covers a wider arc than a flat mid-wall mount that forces a 90° pull around the house.
- Keep about 12 inches of clearance on all sides of the housing so the hose does not snag on downspouts, lights, or an AC unit.
- Walk the real hose path once before you drill. Corners, fences, and raised beds eat reach that a straight-line tape measure misses.
- If you are still sizing hose length, measure from the planned mount — see how to choose the right hose length for your yard.
Best for: One primary watering zone within leader reach of a solid wall.
Not for: Forcing one fixed reel to “do” disconnected front and back yards when the house blocks the path — use a second mount, a better-placed spigot, or a cart.
Sun exposure
If you have a choice, prefer a north- or east-facing wall. Constant direct sun ages plastic housings and hose jackets faster. UV-rated models hold up better; shade still helps any reel.
How to Install on Wood-Frame Walls (Most Common)
This is the most straightforward install and covers most homes.
Step 1: Find the studs
Use a stud finder to locate at least two wall studs in the mounting area. Mark both. Studs are typically 16 inches apart — your bracket may span one or two depending on width.
You must mount into studs. A loaded retractable reel is heavy and pulls outward when the hose is extended. Drywall or siding alone will not hold it.
Step 2: Position the bracket
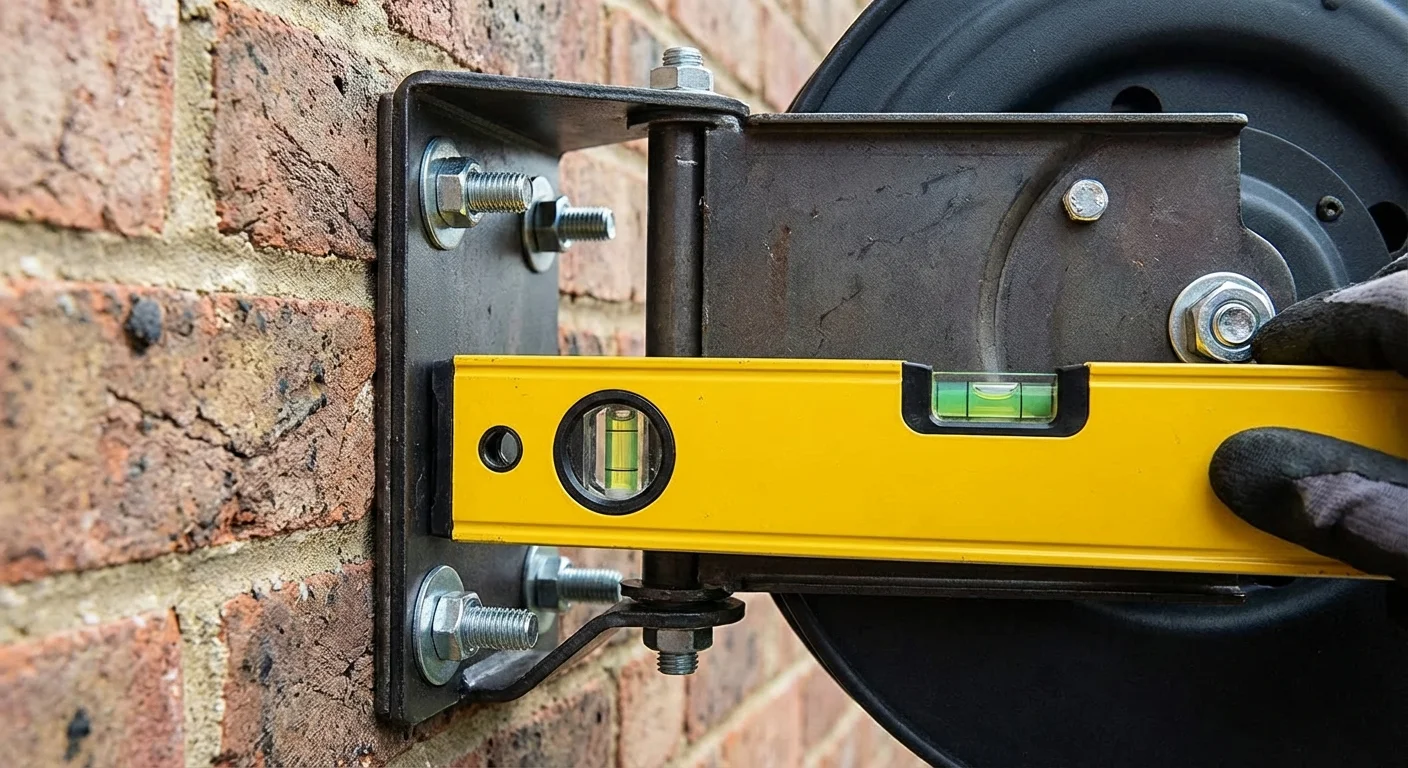
Hold the mounting bracket at your chosen height. Level it — even a small tilt can make retraction uneven. Mark the screw holes.
Step 3: Pre-drill pilot holes
Using a bit slightly smaller than your lag screws (often a 3/16″ bit for #10 screws), drill pilot holes about 2.5 inches into the stud.
Step 4: Mount the bracket
Drive lag screws through the bracket into the pilots. Tighten firmly but do not over-torque plastic brackets. If the reel uses a separate bracket and housing, mount the bracket first, then seat the housing.
Step 5: Connect to spigot
Wrap Teflon tape clockwise around the spigot threads — three full wraps. Attach the leader hose, hand-tighten, then a quarter-turn with an adjustable wrench. Connect the other end to the reel inlet.
Step 6: Water test
Turn on the spigot. Extend the hose, check every joint for leaks, and test retraction. If everything is solid, snug each lag screw a final quarter-turn.
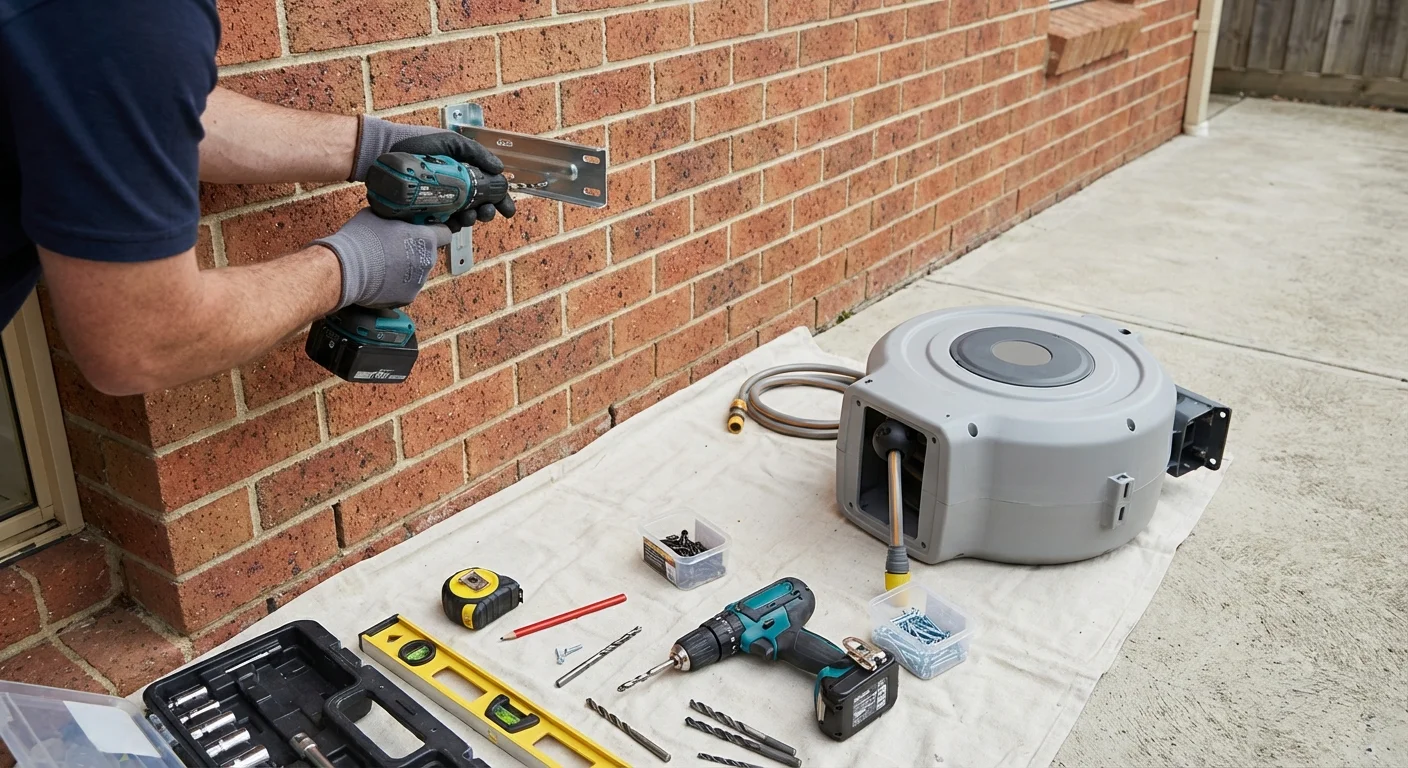
How to Install on Brick or Masonry Walls
Brick takes a little more care, but it is still a DIY job with the right bit and anchors.
What you’ll need (beyond basic tools)
- Masonry drill bit (typically 1/4″ or 5/16″ — match your anchor)
- Plastic or metal expansion anchors rated for at least 50 pounds each
- Silicone caulk
- Safety glasses (brick drilling creates dust)
Step 1: Mark drill positions
Hold the bracket and mark holes. Aim for the center of bricks, not mortar joints. Mortar is softer and anchors can loosen under load.
Step 2: Drill into brick
Switch to the masonry bit. Use hammer mode if available. Drill at a steady pace and go about 1/4 inch deeper than the anchor length.
Step 3: Insert anchors
Tap expansion anchors in snug. If an anchor slides in easily, the hole is too large — move to an adjacent brick position.
Step 4: Seal the holes
Ring each anchor with silicone before mounting. That limits water seeping into the brick and freeze-thaw damage in cold weather.
Step 5: Mount and connect
Bolt the bracket through the anchors, connect the leader with Teflon tape, and run the same water test as wood-frame.
Pro tip: On a weather-facing brick wall, a bead of silicone along the top edge of the bracket helps keep runoff from pooling behind the mount — a common path to early rust.
How to Install on Vinyl Siding
Vinyl often has an air gap behind the siding. Screwing into the siding alone flexes and pulls loose.
The right approach
- Locate studs behind the siding with a stud finder (most work through vinyl).
- Use 4-inch lag bolts that pass through the siding, the air gap, and into the stud. Short screws will not reach.
- Do not over-tighten. Vinyl needs room to expand and contract. Snug, then back off a quarter-turn.
Alternative: mounting block
If you cannot find studs or the gap is too deep, use a vinyl mounting block from a home center. It replaces a section of siding and gives a solid, weatherproof face for the bracket. Many manufacturers recommend this path for vinyl.
Bracket selection for vinyl
A flat-back bracket is usually fine. For a curved or narrow bracket, a 3/4-inch plywood backing plate between bracket and siding spreads the load.
Connecting the Hose to Your Spigot
This step trips up more people than the drill work.
Thread compatibility
Most US outdoor spigots use 3/4″ garden hose thread (GHT). Most retractable reels use 3/4″ GHT inlets. If they match, connect with the leader hose.
If the reel uses a 1/2″ inlet (common on some European models such as Gardena), use a 3/4″ to 1/2″ brass adapter. Keep a spare — check current price; do not rely on a hard-coded dollar figure.
The Teflon tape method
- Spigot off and dry
- Wrap Teflon tape clockwise on the male threads — three to four full wraps
- Press the tape into the threads as you go
- Hand-tighten the fitting
- Quarter-turn with a wrench — no more
- Turn on water and check for drips
If it drips, shut off, strip old tape, add two more wraps, and reconnect. Extra wrench force alone usually makes leaks worse.
First Use: Extending and Retracting the Hose
Do a short test run before the first real watering session.
Prime the retraction
- Pull the hose out slowly to full extension
- Lock it (tug lock or locking collar — follow the manual)
- Release and let it retract fully
- Repeat two or three times to seat the spring
Locking at length
Most retractable reels use tug-to-lock: pull to length, short outward tug to lock; another short tug to release. Some use a button or lever on the housing — check the manual so you do not wear the lock early.
Common first-use mistakes
- Letting go during retraction. Guide the hose back with one hand.
- Retracting a full hose. Drain first — a water-filled hose stresses the spring.
- Pulling at an extreme angle. Around a hard corner, use the swivel so the guide is not grinding.
Troubleshooting: Common Installation Problems
Hose won’t retract
Usually snagged on a bush, chair, or bed edge. Clear the path. If it still will not retract, many models have a side tension adjustment — consult the manual.
Water pressure seems low
Check the leader first. A kinked leader between spigot and reel is a common pressure killer. If pressure stays low, check for a flow restrictor in the nozzle and remove it if your kit includes one.
Reel wobbles or isn’t level
Recheck screw positions. If one lag is in a stud and another is not, the loaded side pulls away. Remount into solid framing. A wobbling reel damages the wall and makes retraction uneven.
Hose leaks at the connection
Most often a Teflon or washer issue. Strip, re-wrap clockwise (3–4 wraps), and reconnect. Inspect the washer inside the fitting — cracked or missing washers are common. Replacement washer packs are inexpensive hardware-store items — check current price.
FAQ
How high should I mount my hose reel?
Between 3 and 5 feet off the ground works best for most people. You can pull without bending, and the hose retracts without dragging. Tall users can go closer to 5 feet. For multiple household users, 3.5–4 feet is a good compromise.
Where should I mount a retractable hose reel for yard coverage?
Put the reel where the hose can actually reach the beds you water — not only where the wall is empty. Stay within leader reach of the spigot, mount at waist-to-chest height, keep clearance from obstacles, and prefer a corner or side placement with a swivel when you need a wider arc. Measure the real walking path of the hose before you drill. For length sizing, use how to choose the right hose length for your yard.
Can one retractable hose reel cover the front and back yard?
Sometimes. It works when one mount can serve both zones without dragging the hose around the building — for example a corner mount with a swivel that opens both directions. When the house splits front and back into separate arcs, one fixed reel usually loses. Better fits: a second mount near the other zone, a longer leader (or second spigot) to a better wall, or a rolling garden hose reel cart that moves between spigots.
Is a 100 ft retractable hose reel enough?
Only if 100 feet reaches your farthest watering point from the mount after you measure the real route. Yard size alone is not a guarantee — corners and obstacles consume length. Round up to the next common size when you are close. Measure with the steps in how to choose the right hose length for your yard. If you are comparing longer listed reels, see best 100 ft retractable hose reel.
Can I install a retractable hose reel myself?
Yes. If you can use a drill and a level, plan on about 30–45 minutes. Wood-frame is easiest. Brick needs a masonry bit and anchors. Vinyl is trickiest because of the air gap — a mounting block solves that. No plumbing experience required.
What screws do I need for a hose reel bracket?
Wood studs: #10 x 3-inch stainless steel lag screws (2–4 depending on bracket). Brick or concrete: 1/4″ x 2.5″ concrete screws or expansion anchors rated for 50+ pounds each. Vinyl over wood studs: 4-inch lag bolts that reach the stud behind the siding.
Can I install on a fence instead of a wall?
Selective yes. Solid wood fences with 4×4 or 6×6 posts can work — mount into a post, not the panels. Chain link and vinyl fences are usually too weak. Recheck fence mounts a few times in year one; posts can shift.
What if my spigot is on the opposite side of the house?
Three common options: (1) Run a longer leader along the exterior and clip it every few feet. (2) Have a plumber add a second spigot closer to where you water — cost varies with run length and local rates; get a quote before you decide. (3) Switch to a freestanding garden hose reel cart instead of fighting a bad wall location.
Related reading
- How to Install a Wall-Mounted Hose Reel
- How to Choose the Right Hose Length for Your Yard
- Best Retractable Hose Reel
- Wall-Mount Retractable Hose Reel
- Garden Hose Reel Cart
- Best 100 ft Retractable Hose Reel
- Buyers Guide
Wrapping Up
Installing a retractable hose reel comes down to three things: the right spot for coverage, solid mounting material, and a leak-free spigot connection.
Still choosing a reel? Start with the best retractable hose reel guide. Prefer wall-mount shopping notes? See the wall-mount retractable hose reel guide. Matching hose length to the yard? Use how to choose the right hose length for your yard.
Happy mounting.
Source: OSHA ladder safety standard (29 CFR 1910.23) — use a stable ladder and follow basic ladder safety if your mount height requires one.